

CSU East Bay has a new Concrete Testing Lab
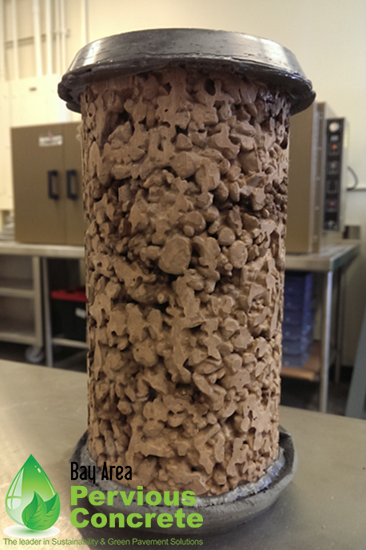
David had taken some samples at a recent pour and wanted to get them tested. Fortunately, Cristian Gaedicke, Concrete Materials Professor at CSU East Bay, had a new lab with brand new equipment to try out. We headed over for a tour and a testing field trip. Below are some photos of our compression test. We also did a void and density test but I hadn’t started taking photos at that point. Below you will see Cristian sawing off the top of the samples, to make them flat for capping.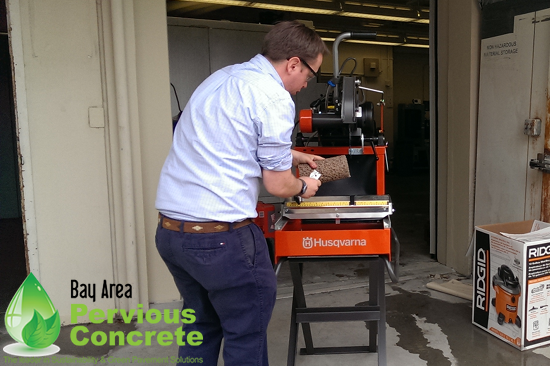
Next, we capped the 2 samples in sulfur, which makes them totally -perfectly- flat. That is also the way we have tested all of the rest of our samples, so we can keep our data consistent. The sulfur is heated in an industrial-type crock pot, under a hood for total ventilation. The green corner piece is the mold that sets the final edge so it is exactly at 90 degrees. 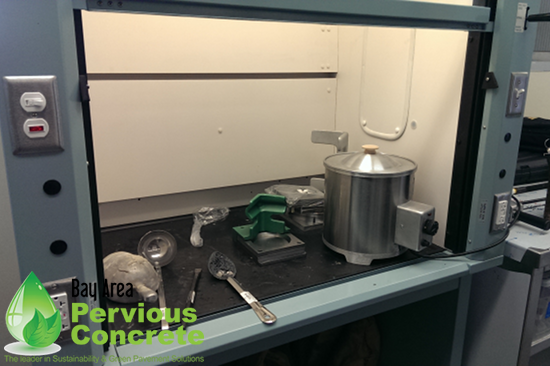
David stirs the melting sulfur chips. Since the lab was pretty new, the sulfur pot hadn’t been used yet!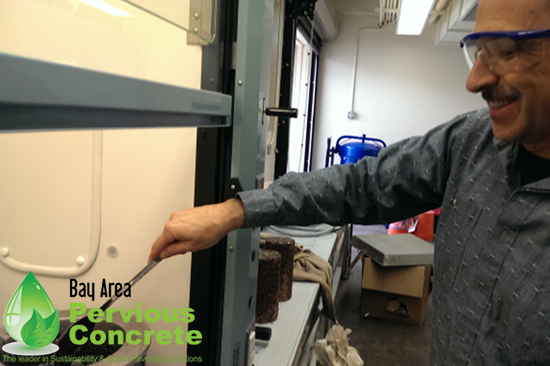
Once the 2 samples were capped, they were put into the crush test. This measures the PSI load of the sample. Below you can see the sample in the crushing machine. 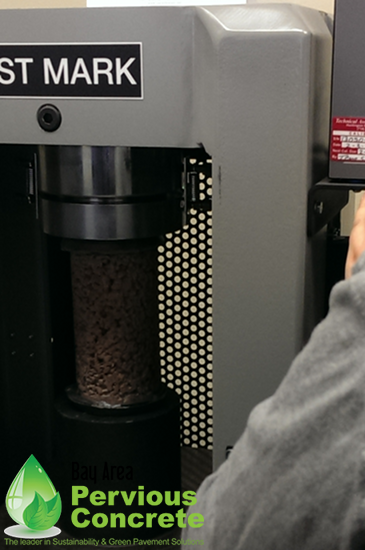
I am taking copious notes, while Cristian is making sure the machine works. 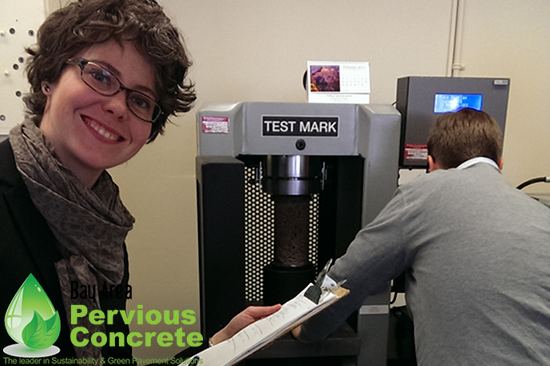
David is also taking notes as the test is being set up.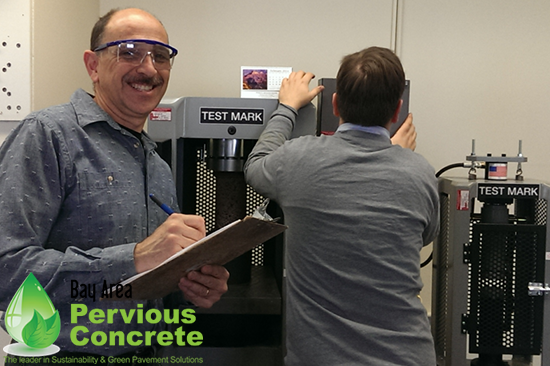
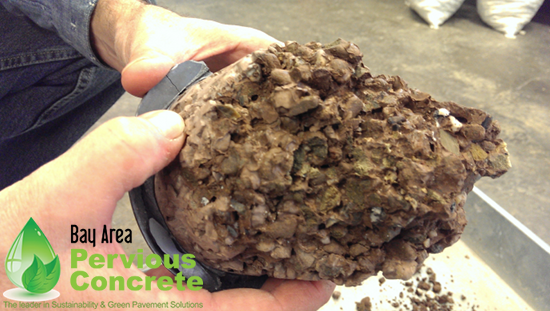
David and Cristian compare notes, and discuss the results. They review the smashed cylinders, seeing the pattern and reviewing paste adhesion in this mix. 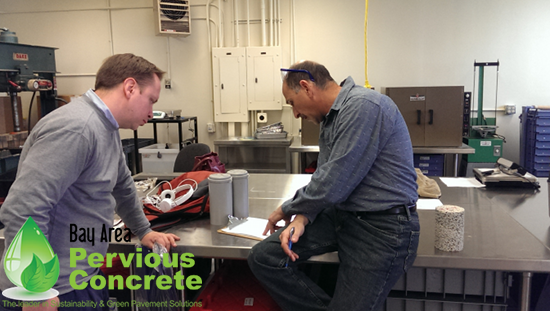
David is very happy with the results!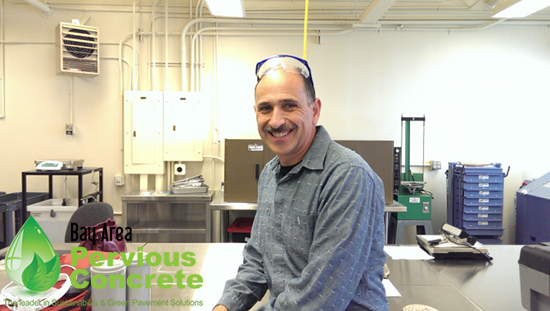
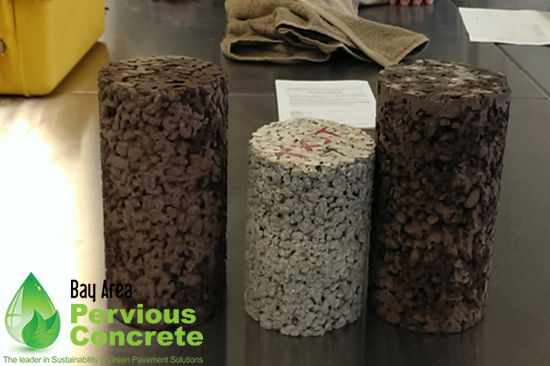
You can see that both cylinders had very consistent crush pattern.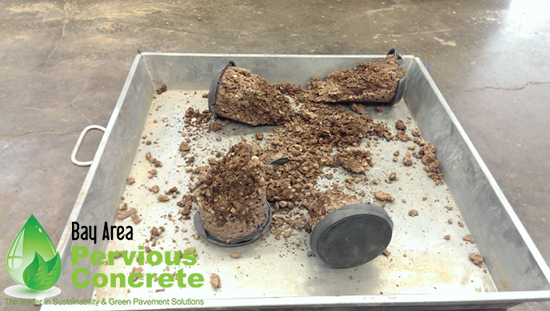
The whole crew, minus the photographer! 
NRMCA Technician Training in Truckee- A Success!
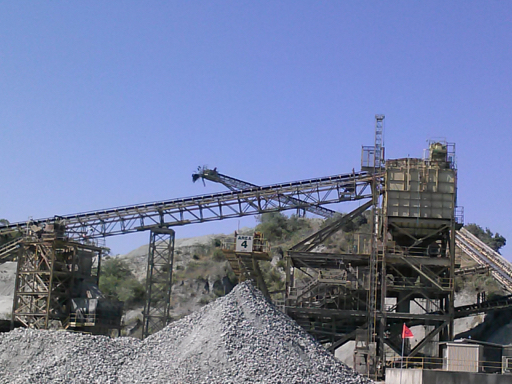
Graniterock Quarry Tour - with Pictures!!
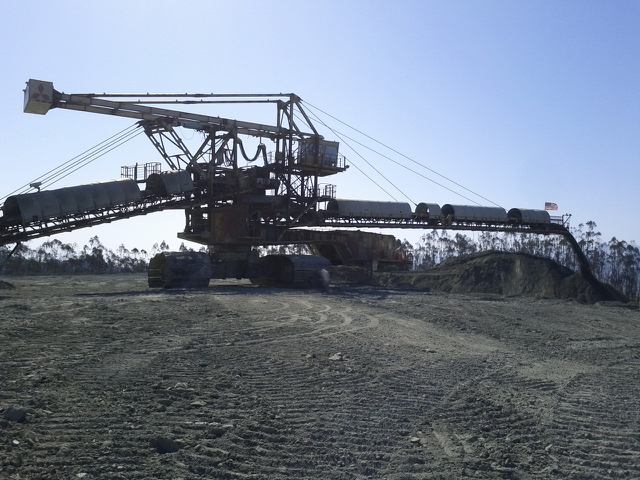
Big Bill(pictured above) was at the end of a 3mile conveyor belt bringing material from the waste end of the crushing processing to the spreader. The wheels were at least 10 feet in diameter! It was a massive machine! The material being spread looked like moon dust!
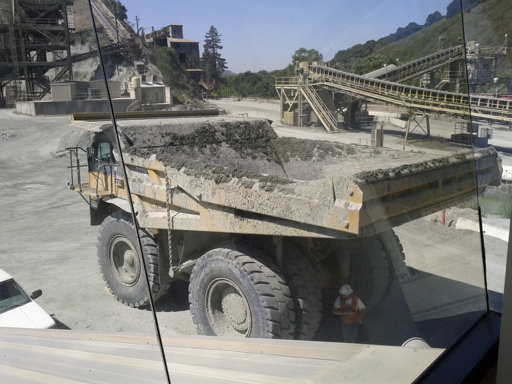
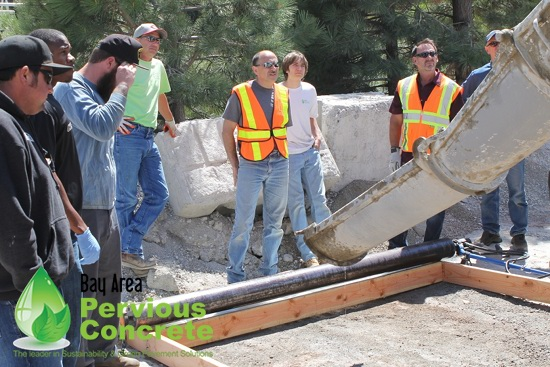
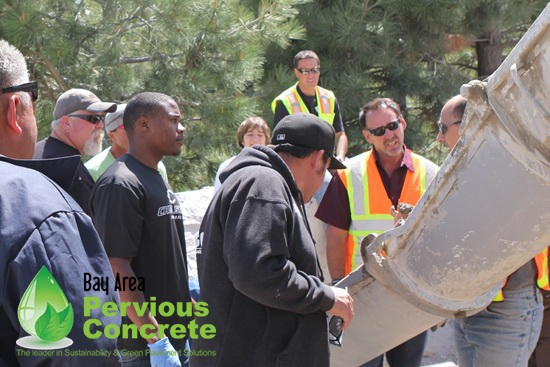
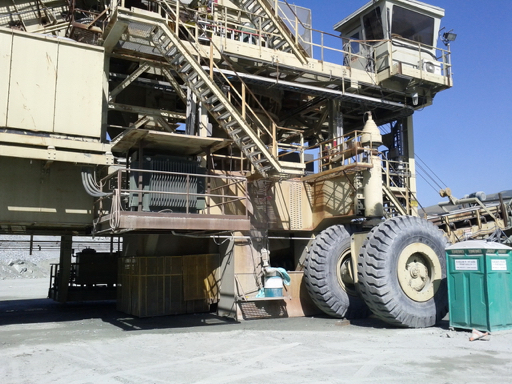
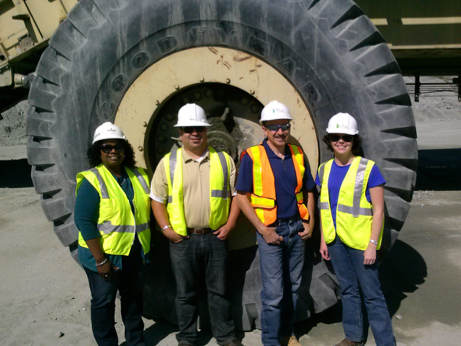
After leaving Big Bill we went into the quarry. You could see the step-like traces of material that had been removed. The terraces started at the top of the hill and went rather deep, below sea level! There was this massive truck (pictured above)that was moving the 'raw' rock and rubble close to the initial crushing machine (picture below). The crushing machine was in the quarry and it was even more massive then Big Bill the spreader! Here are a few photos of the team with the crusher. It was not running at the time, I would imagine it would be deafening! From the large initial crusher, another conveyor, shorter then the 3 miler, takes the material to the processing yard.
The material on the initial conveyor is then sorted into two sizes (big, for dry processing, and smaller, for wet processing) before being further sifted, crushed and rinsed to final product sizes and blends. The processing yard was a maize of conveyors, buildings on stilts (the crushing/processing/screening) and piles of material. Going into their control tower, we could see the levels of complexity and organization to keep all of that machinery moving that went unseen in the maize outside the windows. Even further beneath the surface of the processing yard was another conveyor in a tunnel beneath the main stockpiles, to allow for high control of the custom blends and product development.
Graniterock's newest addition to the quantitative analysis even had this fabulous quality assessment program that noted the size of final aggregate moment to moment to ensure consistency of the final product. They could, in real time, plumb their data and understand how consistent their product was, and make appropriate adjustments to bring it back into line. That type of feedback allows the quality team to be responsive to current inventory as well as give the operations team insights as to how well their processes are processing. It was a fantastic set-up, although I may be a data geek.
It was a fantastic tour of a great facility. We learned a lot about the aggregates that we use frequently in the Peninsula as well as how it gets to us. Really good quality rock makes even better pervious concrete! Please send us comments or questions! ![]()
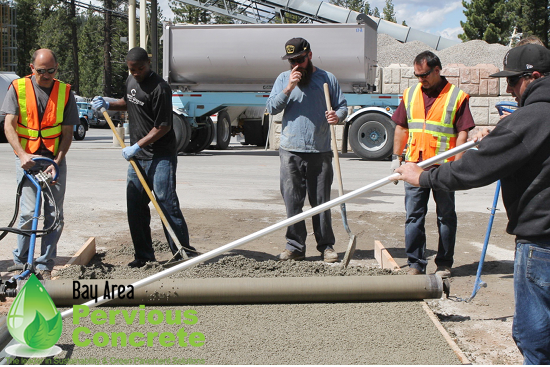
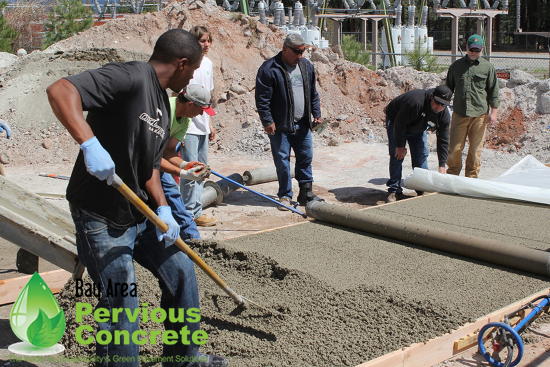
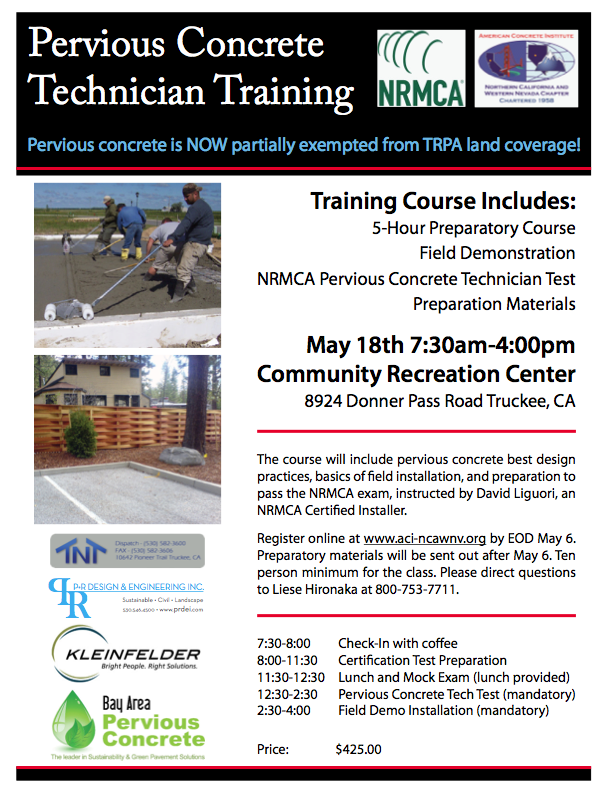
Pervious Concrete Technician Course offered in Truckee!
RC Ready Mix - Sample Slab with Decorative Pervious
We teamed up with RC Ready Mix to do a sample pour over in their yard, with their aggregate. They wanted to see how it went down, and we wanted to see how our mix design would work with their rocks. Not only did the installation turn out REALLY WELL, but Rob Estrada was able to really show us all a few MORE possibilities for decorative pervious concrete!
The first question is always ‘how well does it drain?’ Check out the video below to watch the front end loader dump a bucketful of water on the slab!
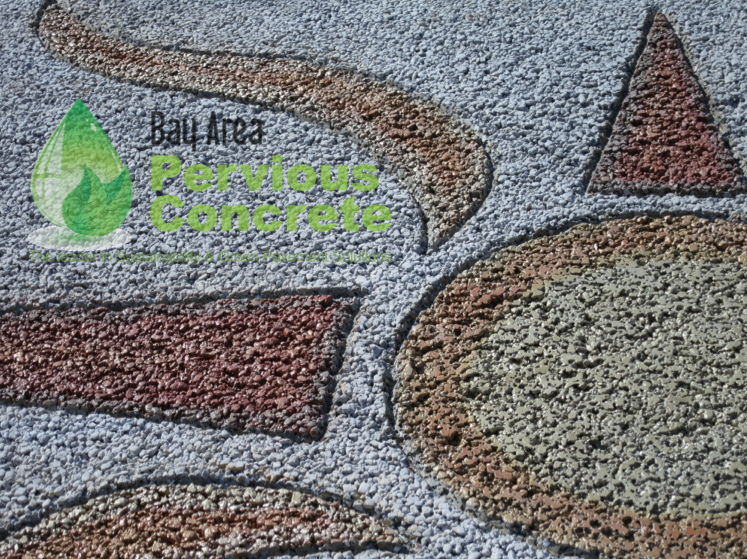
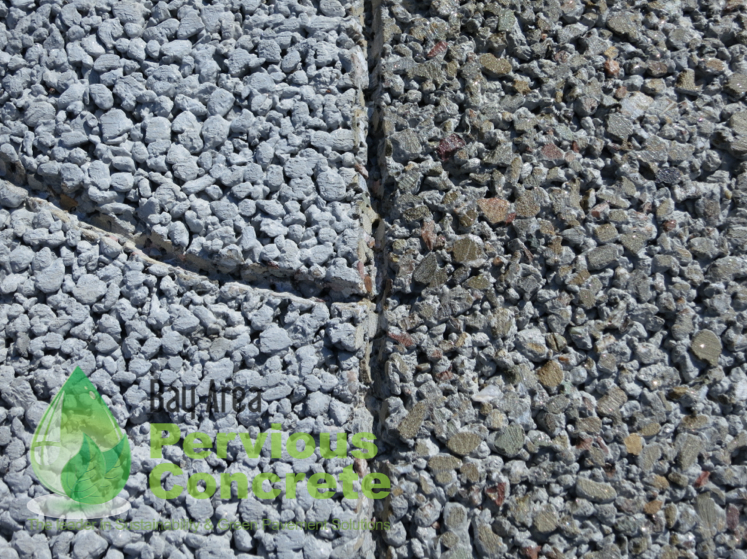
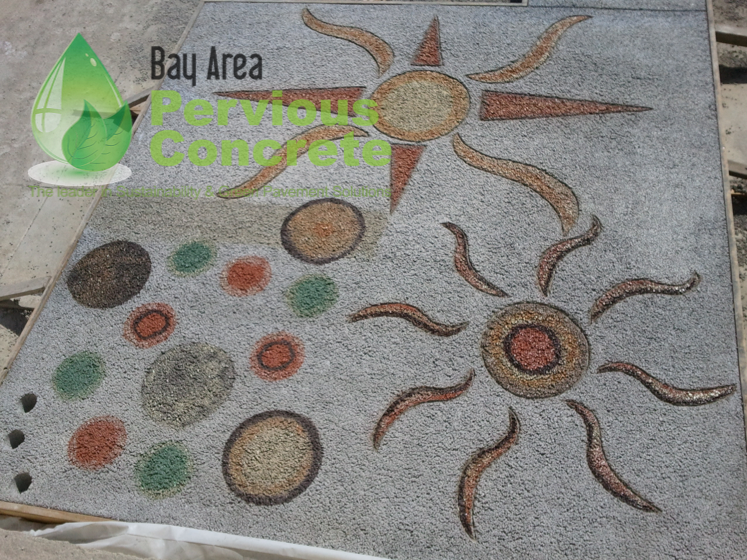
We agree with the driver, thumbs up! A few days later, Rob went over there to try some designs to see how they could look. We are well known for our Polished Pervious™, which you can see below, next to the Classic Pervious Concrete.
Then he added some designs. There are arc-like flagstone shapes on the left, and more rustic stone shapes on the right.
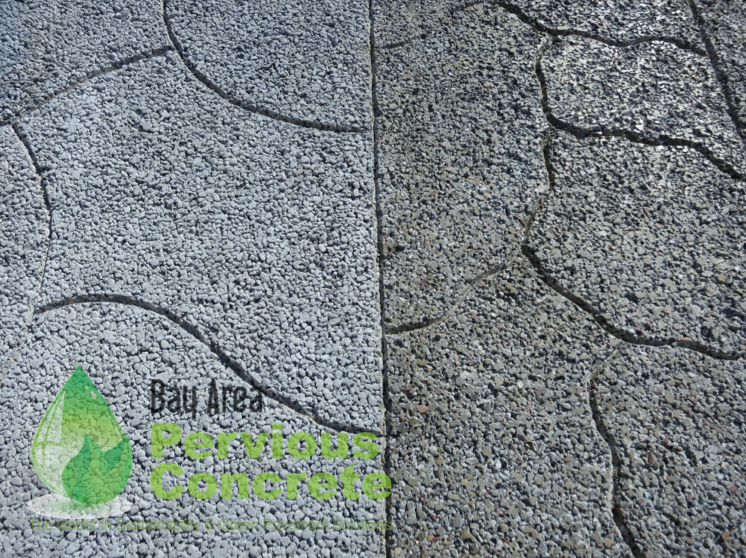
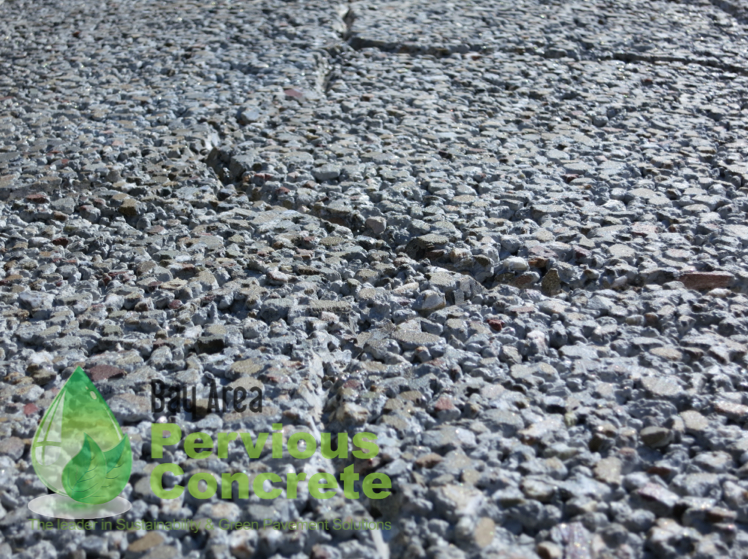
To get a closer look at the great texture, we took a close up. You can see the Polished Pervious Concrete ™, and then set into the pervious a pattern that was added well after the plastic was pulled up.
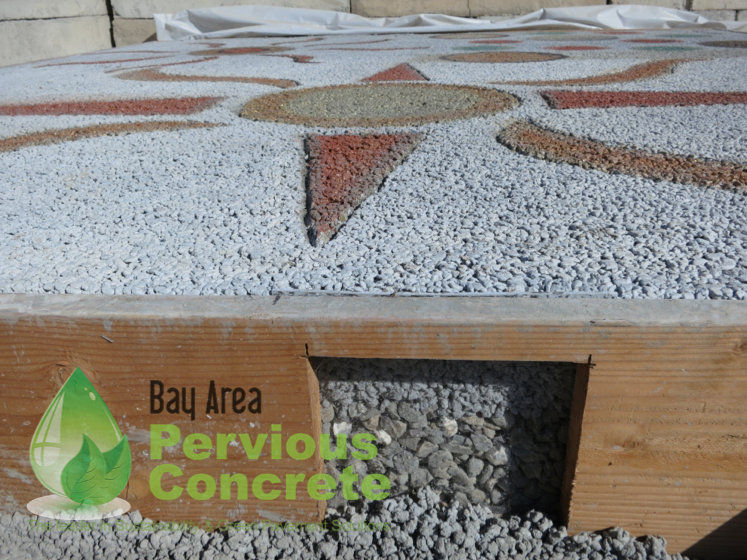
And here is where Rob really let loose! As Rob added these layers of color and texture to the Pervious Concrete, you can see the window that RC Ready Mix installed when they were framing. That allows one to see the water going through the layers of the Pervious Concrete System.
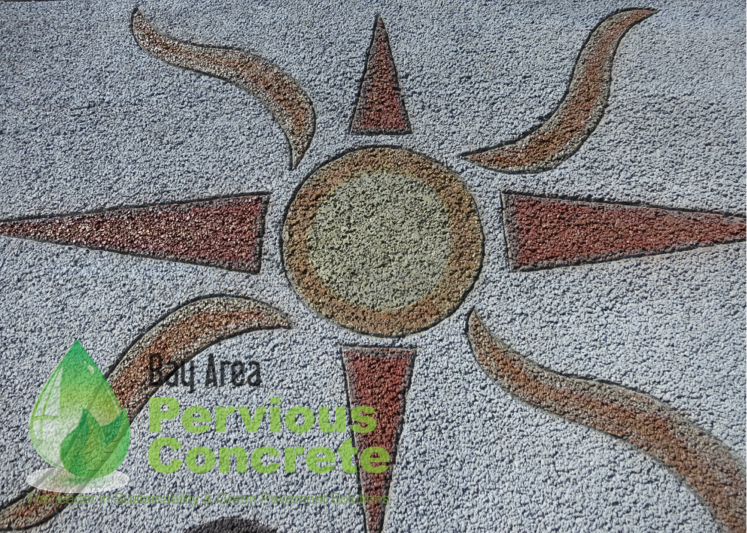
Here is most of the slab - you can see the suns and the moon and the gorgeous colors that were used!
If you would like to see this in person, it will only be in the yard for a limited time. Contact us or RC Ready Mix in Livermore for more information.